Bazel Remote Cache

前面讲了Bazel的基本本地使用,但是我们知道,Bazel最重要的是支持缓存和分布式(远程执行),那么这一节主要就是讲如何让bazel使用缓存。

要能够缓存Bazel每个action的输出,我们就要一个server来实现remote cache,用于存储action的输出。这些输出实际上是一堆文件恶化对应的hash值。总体来说,我们需要满足三个前提:

  • 设置一个server作为cache backend
  • 配置Bazel build去使用cache
  • Bazel版本要在0.10.0以上

Cache本身会存储两种数据:

  • action cache,或者说实际上是一个acton->action result的map映射表
  • 一个可寻址(addressable)的输出文件存储系统

https://docs.bazel.build/versions/master/remote-caching.html 中对Bazel Remote Cache的使用和工作有更详细的介绍,就不重复了。这里直接讲到底怎么设置一个Bazel Remote Cache Server. 在上面这个链接中提到了三种方式:

  • NGINX的WebDAV模块
  • 开源的bazel-remote
  • Google Cloud Storage

这里我们直接选择第二种:开源的bazel-remote,以便可能的定制及更好理解内部实现。

buchgr/bazel-remote

这里我们不用去重新编译运行,直接下载对应的docker镜像并运行即可

1
$docker pull buchgr/bazel-remote-cache

bazel-remote支持grpc和http的接口调用,但注意docker内部应用的http接口应该是8080而不是9090(官方文档有误)。

创建一个目录cache, 然后启动docker容器如下

1
2
3
4
5
6
7
8
9
10
11
$ docker run -u 0 \
-v `pwd`/bazel_cache:/data \
-p 7070:8080 \
-p 9092:9092 \
buchgr/bazel-remote-cache \
--max_size=50
# docker run -u 1000:1000 -v /root/cache:/data -p 8080:8080 -p 9092:9092 buchgr/bazel-remote-cache
2021/11/23 04:45:03 bazel-remote built with go1.17.3 from git commit f7f92a5298b0fd19e254b2b25f7f26cd930b2e2d.
2021/11/23 04:45:03 Initial RLIMIT_NOFILE cur: 1048576 max: 1048576
2021/11/23 04:45:03 Setting RLIMIT_NOFILE cur: 1048576 max: 1048576
2021/11/23 04:45:03 mkdir /data/cas.v2: permission denied
1
$ docker container update --restart=always 容器名字

We recommend deploying bazel-remote-cache with Docker Compose

1
2
3
4
5
6
7
8
9
10
11
12
13
14
15
# https://stackoverflow.com/questions/64341356/pass-arguments-into-docker-container-from-docker-compose-yml
# cat docker-compose.yaml
version: '3'
services:
bazel_remote_cache:
image: buchgr/bazel-remote-cache:latest
container_name: bazel
user: 0:0
volumes:
- /data1/bazel_cache:/data
ports:
- 7070:8080
- 9092:9092
restart: always
command: --max_size=100

Save as docker-compose.yaml, create config.yaml in the same directory, and run the below commands to get bazel-remote-cache up:

1
$ docker-compose up -d

You can view the logs with:

1
$ docker-compose logs

Stop bazel-remote-cache with:

1
$ docker-compose stop && docker-compose rm -f

使用具有mkdir权限的docker 用户, user 0 为root用户

1
docker run --user 0 -v `pwd`/bazel_cache/:/data -p 8080:8080 buchgr/bazel-remote-cache --max_size=20

我们可以看到一堆输出:

1
2
3
4
5
6
7
8
9
10
11
12
13
14
15
16
2020/10/13 16:12:20 bazel-remote built with go1.14.5 from git commit cc9030667416ab63d89b9fbf543f0243292009b4.
2020/10/13 16:12:20 Initial RLIMIT_NOFILE cur: 1048576 max: 1048576
2020/10/13 16:12:20 Setting RLIMIT_NOFILE cur: 1048576 max: 1048576
2020/10/13 16:12:21 Migrating files (if any) to new directory structure: /data/ac
2020/10/13 16:12:21 Migrating files (if any) to new directory structure: /data/cas
2020/10/13 16:12:21 Loading existing files in /data.
2020/10/13 16:12:23 Sorting cache files by atime.
2020/10/13 16:12:23 Building LRU index.
2020/10/13 16:12:23 Finished loading disk cache files.
2020/10/13 16:12:23 Loaded 0 existing disk cache items.
2020/10/13 16:12:23 Starting HTTP server on address :8080
2020/10/13 16:12:23 HTTP AC validation: enabled
2020/10/13 16:12:23 Starting HTTP server for profiling on address :6060
2020/10/13 16:12:23 Starting gRPC server on address :9092
2020/10/13 16:12:23 gRPC AC dependency checks: enabled
2020/10/13 16:12:23 experimental gRPC remote asset API: disabled

然后可以通过其/status接口来查看是否正常启动

1
2
3
4
5
6
7
8
$curl http://10.11.11.107:7070/status
{
"CurrSize": 0,
"MaxSize": 5368709120,
"NumFiles": 0,
"ServerTime": 1602605641,
"GitCommit": "cc9030667416ab63d89b9fbf543f0243292009b4"
}

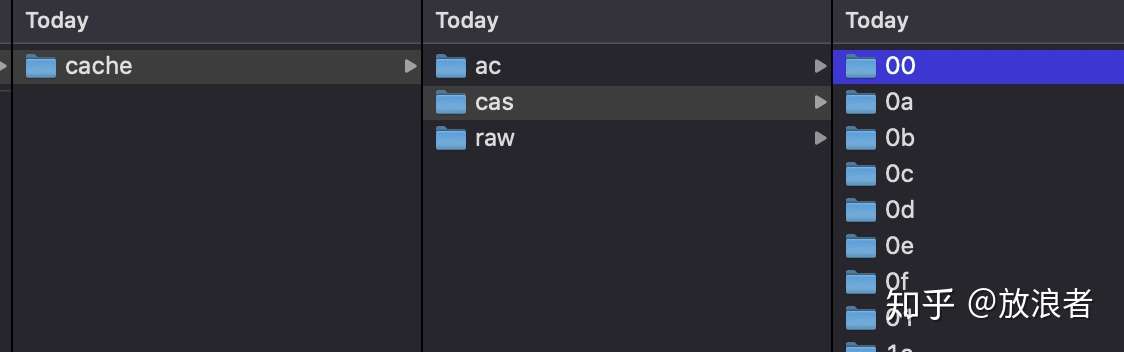
另外我们也可以查看cache目录下是否生成了对应文件:

img

这时就可以在运行bazel build的时候指定remote cache server的地址:

使用Bazel Remote Cache
在Bazel工程的工程目录下,创建.bazelrc文件,并进行如下配置:

1
2
3
4
# 指定Bazel Remote Cache的Http IP地址和端口,低版本bazel支持
build --remote_http_cache=http://172.24.136.52:7070
# 高版本bazel直接使用
build --remote_cache=http://172.24.136.52:7070

或者直接build target后加上–remote_cache参数

1
2
3
4
5
6
7
8
9
10
11
$bazel build //src/main:app --remote_cache=http://172.24.136.52:7070
INFO: Invocation ID: a9a389d2-1e9f-4878-b65b-586e7b70fa35
INFO: Analyzed target //src/main:app (0 packages loaded, 0 targets configured).
INFO: Found 1 target...
Target //src/main:app up-to-date:
bazel-bin/src/main/app_deploy.jar
bazel-bin/src/main/app_unsigned.apk
bazel-bin/src/main/app.apk
INFO: Elapsed time: 3.271s, Critical Path: 3.02s
INFO: 12 processes: 9 darwin-sandbox, 3 worker.
INFO: Build completed successfully, 13 total actions

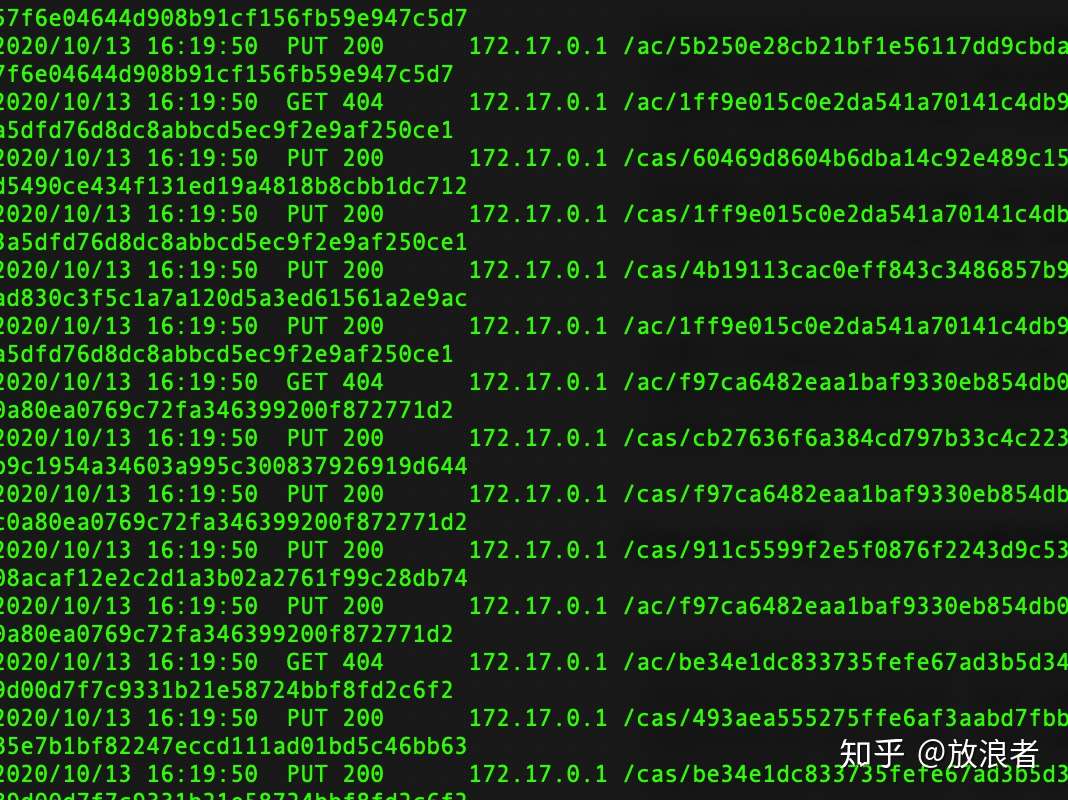
在docker一侧,我们可以看到输出

img

可以看到cache主要是通过http put/get,并使用hash作为key来进行对应结果的查找。

我们重复几次bazel build后可以看到耗时很短,只有不到0.3秒:

1
2
3
4
5
6
7
8
9
INFO: Analyzed target //src/main:app (0 packages loaded, 0 targets configured).
INFO: Found 1 target...
Target //src/main:app up-to-date:
bazel-bin/src/main/app_deploy.jar
bazel-bin/src/main/app_unsigned.apk
bazel-bin/src/main/app.apk
INFO: Elapsed time: 0.286s, Critical Path: 0.03s
INFO: 0 processes.
INFO: Build completed successfully, 1 total action

这显然是cache的作用,我们也可以在BUILD文件中禁止cache。这实际上是对rule的tags设置(我们在以后再讲如何定义rule),我们在这里可以尝试对java_library这个rule添加tag,禁止cache。修改src/main/java/com/example/bazel/util/BUILD中的java_library属性如下:
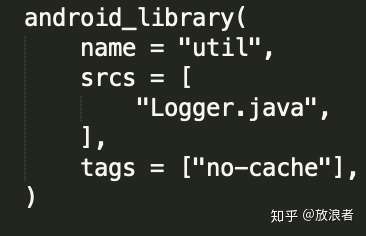
img

这样bazel就不会对该BUILD的结果进行缓存,读者可以自行尝试对比,这里就不过多展示实验结果。

实际上,remote caching只是最基本的一个结果缓存机制,部署和使用都很简单,这里也只是对此进行快捷说明。小团队完全可以用这种方式来部分提升效率。而远程执行(Remote Execution)往往集成了缓存功能,因此在实际大型团队部署中一般不会专门对Remote Cache创建server。我们在下一节来介绍Remote Execution.

–noremote_accept_cached: disable remote cache accept, but upload.

Bazel remote Execution

https://bazelbuild.github.io/bazel-buildfarm/docs/quick_start/

References:

https://zhuanlan.zhihu.com/p/265542636

curl http://104.238.213.119:7070/status